
When it’s time to replace a chain or swap out a master link, having the right master link pliers makes the difference between smooth maintenance and frustrating fumbling. Sure, you could try those internet hacks—threading a shoelace to remove them and then using pedaling force to snap the new one back in place. But let’s be real: when you’re maintaining a bike worth thousands of dollars, investing in proper master link pliers starting around $10 makes more sense than wrestling with workarounds.
Now that we’re on the same page about using the right tool for the job, let’s talk about your options. For this discussion, we’re focusing on workshop master link pliers—the ones that live in your toolbox or hang on your pegboard. The compact, lightweight versions designed for trail-side repairs are a different beast entirely. While those portable options can save your ride when you’re miles from home, they’re typically too fragile and awkward for regular shop use.
Understanding the Two Main Pliers Designs
When shopping for master link pliers, you’ll find two primary camps: two-prong and three-prong designs. What’s the difference? Well, for the engineers reading this, exactly one prong. But that single prong changes everything about how these tools operate.
Two-Prong Master Link Pliers: The Original Design
Two-prong master link pliers represent the original approach to this problem, and their simplicity shows in both design and price. They’re typically your most budget-friendly option, which explains why many cyclists start here.
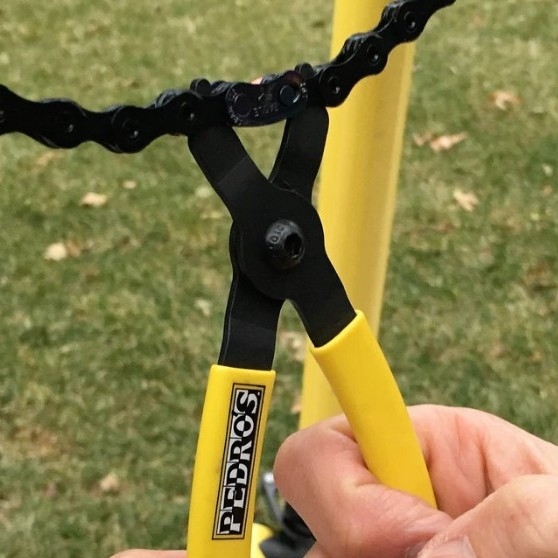
For removal, the operation is straightforward: each prong slides into the chain links neighboring the master link. Squeeze the handles, and the master link pops open. Installation reverses the process—but here’s where things get interesting. You’ll need to pull the handles outward rather than squeezing them together. This usually requires both hands, and sometimes you’ll wish for a third hand to stabilize the master link itself. It becomes a bit of a juggling act, especially when you’re working alone.
Watch out for incomplete tool sets. KMC, for example, sells separate pliers for removing and installing master links. Unless you’re planning to only do half the job, you’ll need both sets. Suddenly that budget option doesn’t look so economical.
Some manufacturers have tried improving the two-prong design with ergonomic innovations. YBN and Topeak both offer master link pliers with handles set at unique angles, potentially reducing hand strain during those awkward outward pulls. It’s a smart evolution of the basic design that shows someone actually thought about how mechanics use these tools.
Three-Prong Master Link Pliers: The Evolution
Adding that third prong might seem like a small change, but it transforms the user experience. Tools like the Shimano TL-CN10 and SuperB TB-3323 exemplify this improved design.
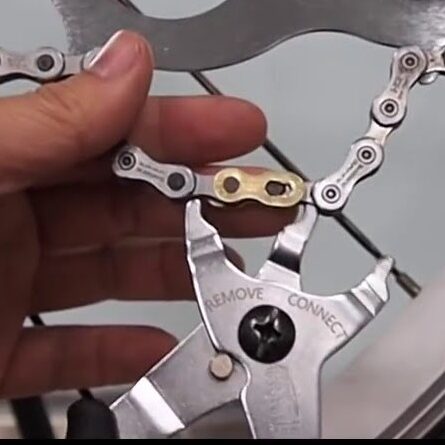
The game-changer? You squeeze the handles for both removing AND installing the master link. This single-handed operation makes the entire process smoother and more controlled. No more wrestling with opposing handle movements or wishing for an extra hand. The third prong stabilizes the link while the outer prongs do their work.
Starting around $29, three-prong master link pliers cost more than their two-prong cousins. You’re paying for convenience and efficiency—valuable commodities when you’re maintaining multiple bikes or changing chains regularly. However, beware of suspiciously cheap three-prong options. Budget models often feature prongs too thick to fit properly between chain plates, rendering them useless for your actual chains.
The Four-Prong Wild Card
Just when you thought the choice was simple, Kilimanjaro introduces a four-prong design that operates similarly to three-prong models but with a twist—literally. The handles sit perpendicular to the prongs, creating a unique grip orientation.

For cyclists who perform maintenance with their bike on the ground rather than in a work stand, this perpendicular design offers better leverage and accessibility. It’s one of those innovations that makes you wonder why nobody thought of it sooner, especially if you’ve ever tried reaching around a bike frame with traditional pliers.
Making the Right Choice for Your Workshop
The best master link pliers for your workshop depend on how often you work on chains and what feels comfortable in your hands. Two-prong designs work fine for occasional use, but if you’re maintaining multiple bikes or frequently swapping chains for different conditions (like switching between traditionally lubed and waxed chains), the efficiency of three-prong pliers justifies the higher price.
Quality matters more than prong count, though. Well-made two-prong pliers will outperform cheap three-prong options every time. Look for hardened steel construction, smooth joint operation, and prongs thin enough to fit your specific chain brand. Some manufacturers optimize their tools for their own chains, so compatibility isn’t always universal.
The Bottom Line
Master link pliers eliminate the frustration from chain maintenance, turning what could be a knuckle-busting experience into a simple, controlled operation. Whether you choose two-prong, three-prong, or even four-prong designs, having the right tool means spending less time fighting with your chain and more time riding.
At Vital Bike Chains, we use professional-grade master link pliers daily in our workshop. When you’re handling chains as frequently as we do, the right tools aren’t just convenient—they’re essential for consistent, quality work. While we offer both budget-friendly options and professional Park Tool pliers, any properly designed master link pliers beat the alternatives of shoelaces, needle-nose pliers, or pure determination.
Ready to upgrade your chain maintenance game? Check out our selection of master link pliers and find the design that works best for your workshop setup and maintenance style.
Search for master link pliers HERE.